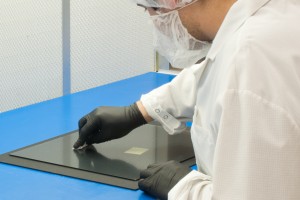
aka, How to Clean an LCD Monitor 101
If you’re anything like me, you’re never thrilled with the smudges that show up mysteriously on your monitor. I’ve never quite figured out from where those smudges come. I mean, I’m pretty sure I’m not putting them there. What purpose would be served by wiping my computer screen with a sweaty palm? I’d be willing to wager that, given the right tools, a CSI unit could uncover some interesting details about a person’s life just from the contents of those smudges and fingerprints.
Well, your friends at General Digital’s Optical Bonding Laboratories are here to clear your murky view…and educate you a bit, as well. We’re going to help you wipe away your “history” the way the professionals do. Trust me, this is a little more complicated than dipping a Kleenex in a cup of Perrier.
As with any other great endeavor, one must start with the proper equipment. Latex gloves are absolutely essential: use the ones that are oil-free and without powder. Be sure to test a small area in the corner of the screen to make sure that the gloves don’t leave any residue. You’ll also need filtered ionized air from an oil-less compressor or simply canned air, the type you can buy at your typical electronics or office supply store. And don’t forget the lint-free wipes (what are commonly referred to as cleanroom wipes) necessary to actually remove any debris from the surface.
You’ll need a good cleaning agent to wrest those smudges from your screen. Here at General Digital, we use Uvex® Clear; a fairly common cleaner in the industry, Uvex® Clear is an alcohol- and silicone-free lens cleaning solution. Many times, Uvex® Clear will be all you need to remove smudges and stains. When we encounter a stubborn stain, we will then upgrade to isopropanol, which gives a little more bang for the buck. A good rule of thumb is to start with Uvex® Clear and work up from there.
Finally, all that is left is the execution of this endeavor. After folding the lint-free wipes in half twice, spray the wipe with the cleaner. Never spray the screen directly. You’ll want to lightly wipe the screen from top to bottom. Because the height of the screen is a shorter distance than the width, you are less likely to re-deposit debris onto the screen. Also, you’ll want to wipe the screen at a rate that is slow enough to wipe away any foreign particles but fast enough not to leave smudges in its wake.
Although this technique works for LCDs, plasmas, and touch screens, as well as most other substrates, it may take a few attempts to clean the screen. With each swipe, be sure to use a clean portion of the wipe. The last thing that you want to do is reintroduce debris to the screen. After the careful removal of dust, prints, and smudges, there is only one thing left to do. Use a stream of compressed gas to remove any lingering debris. You will discover a gleaming ‘new’ screen awaits you!


